Plugin Installation
1. Purchase and download the plugin .zip file from your account or your email.
2. Go to: WordPress Admin > Plugins > Add New and Upload Plugin with the file you downloaded with Choose File.
3. Install Now and Activate the plugin.
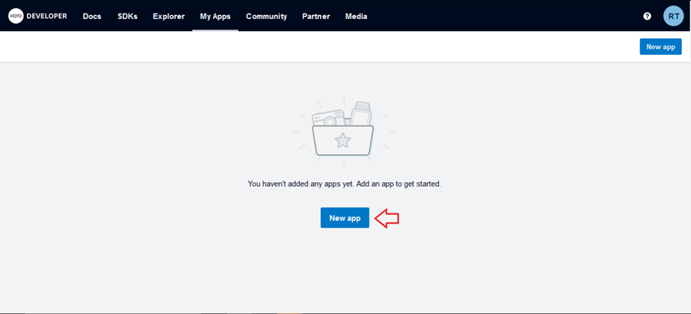
Create connection from Woocommerce to Xero
Step 1: Create Xero app
Open https://developer.xero.com/myapps and click “New app” to create Xero app (you may need to log in using your xero.com account).
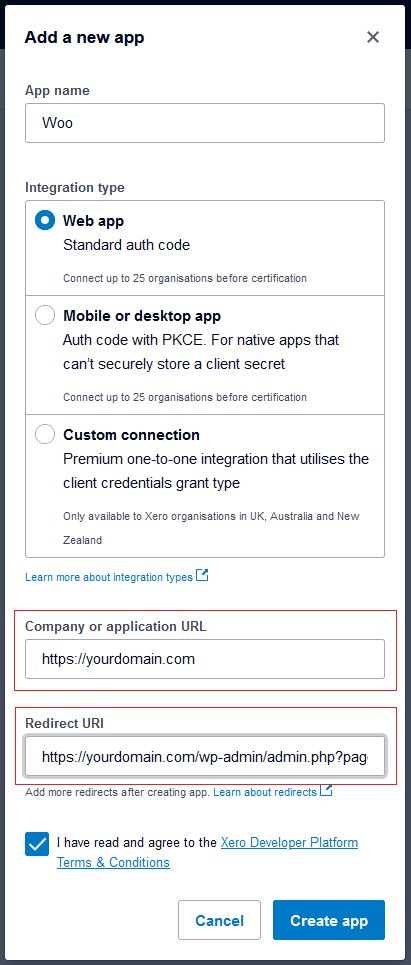
Step 2: Below screen will be displayed
· App name: Name your app
· Integration type: select “Web app“
· Company or application URL: Fill your store domain, example: https://your-domain.com
· Redirect URI: Fill in using the below url. Remember to replace your-domain.com with your store’s domain name:
https://your-domain.com/wp-admin/admin.php?page=wc-settings&tab=xerosync&action=crm_callback
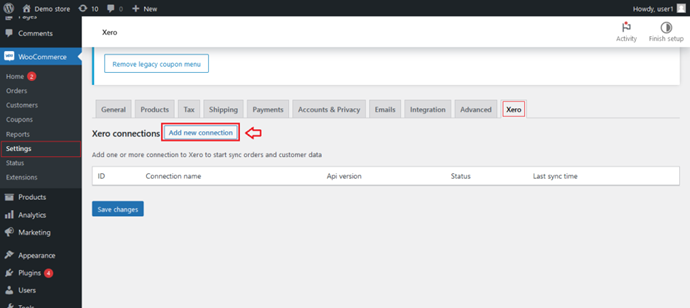
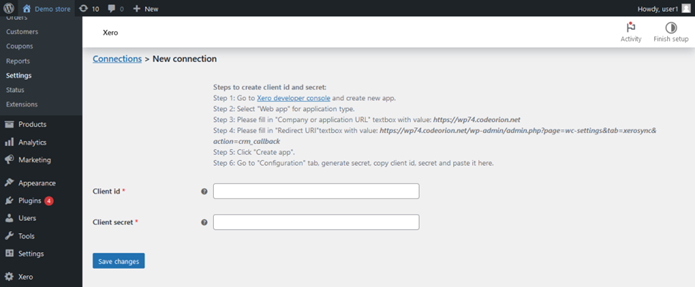
Step 3: Get Client id and client secret.
Go to Configuration tab and click “Generate a secret” button. Copy client id and client secret to use in step 5

Open your Woocommerce admin panel, go to WooCommerce > Setting > Xero and click “Add new connection”
Step 4: Create connection from Woocommerce to Xero
Fill the client id and client secret that you generated in step 3 into corresponding textboxes.
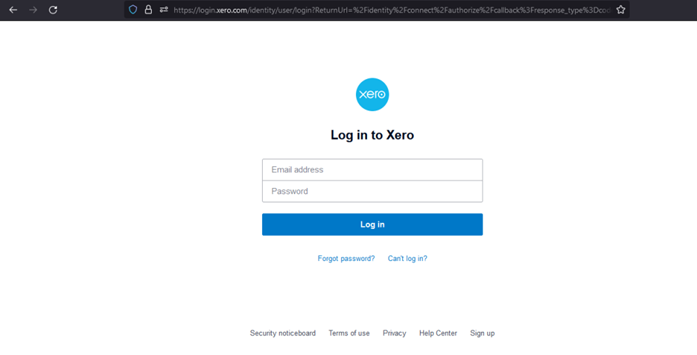
Step 5: Login with your xero account
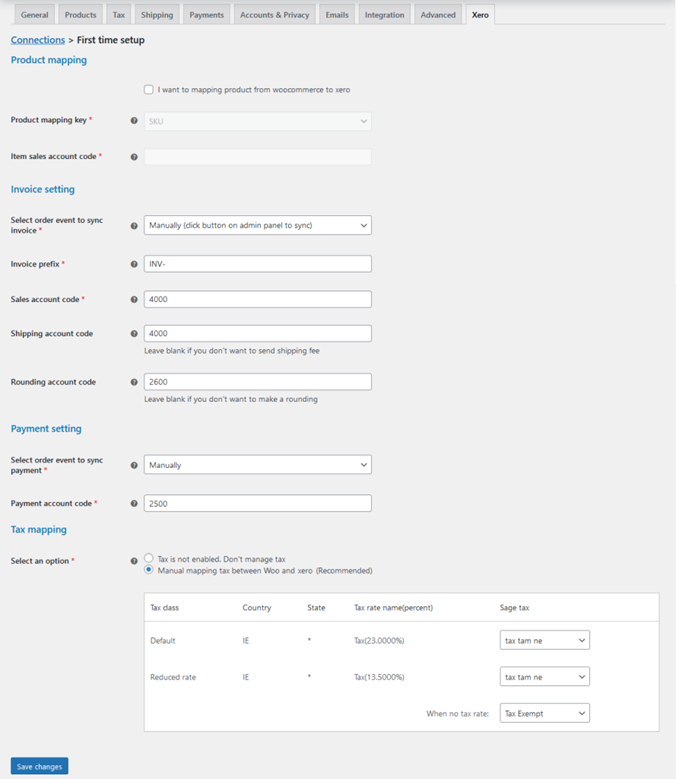
Integration configuration
Once successfully logged in with your xero account, it will automatically go to this first time setup screen (while using the plugin, you can still open this screen to edit if necessary).
Product mapping section: disabled by default.
By default, woocommerce product will not be mapped with xero item. If you want to map the product, please tick the checkbox “I want to mapping product from woocommerce to xero”.
· Product mapping key: Use can select product SKU or product name for mapping.
Invoice setting section:
· Select order event to sync invoice: Select manual or automatic invoice sync mode.
· Invoice prefix: Prefix for your Xero invoice.
· Sales account code: Fill Xero account code to collect sales.
· Shipping account code(optional): Fill Xero account code to track shipping amount. If you leave it blank, sales account code will be used for tracking shipping.
· Rounding account code(optional): Fill account code to track adjustment amount. If you leave it blank, rounding adjustment for order total will be ignored
Payment setting section:
· Select order event to sync payment: Select manual or automatic payment sync mode.
· Payment account code: Fill account code to collect payment for your order.
Tax mapping section:
· If tax rates is not enabled on your store, please select “Don’t manage tax” option.
· If tax rates is enabled, please select “Manual mapping tax between Woo and Xero” option and then map tax rates manually between two system.
Manual sync
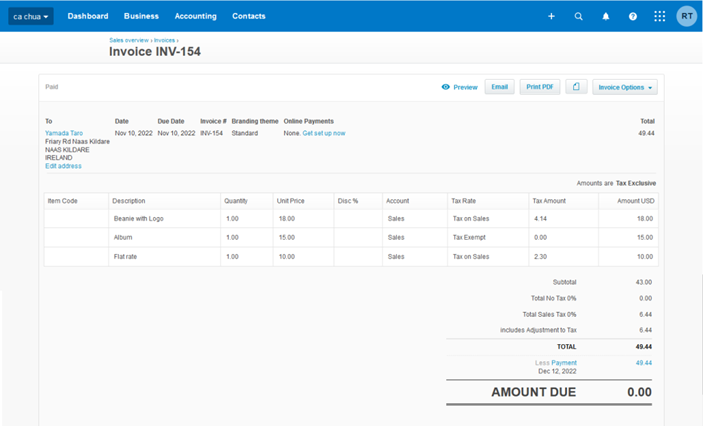
If you select “manual” for “invoice “, order will never be sync unless you open your oder detail and click the following buttons in sequence: Sync contact > Sync Invoices > Sync payment

Result in Xero:
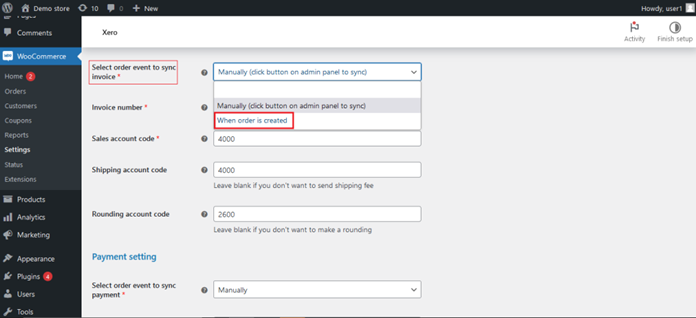
Automatic sync
If you want to switch from manual sync mode to automatic sync mode, go to: Xero > Mapping setting, on the “Select order event to sync invoice” and select event when automatic sync will be triggered. Do the same with payment
Filter by sync status
In the WooCommerce order list screen, a “sync status” column will be added to help you easily filter the order list by sync status

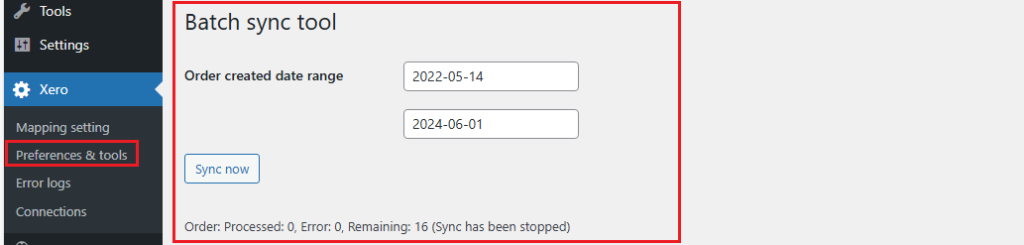
Sync history orders
We provide you batch sync tool that helps you sync orders that have been created in the past. Please select the order created date range and click the “sync now” button.
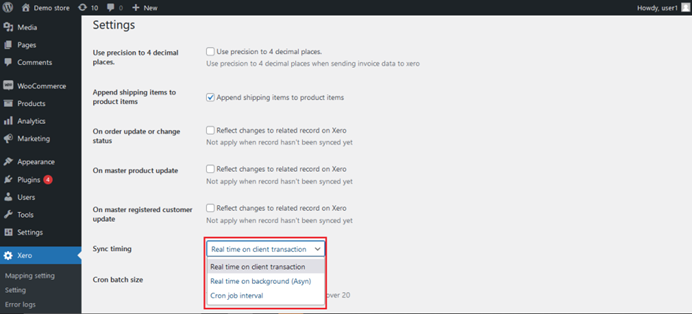
Miscellaneous settings
Go to Xero > setting to see more advance setting
Use precision to 4 decimal places: By default, Xero API set unit Amout to two decimals places. If you require greater precision, you can check this checkbox to make 4 decimal precision
Append shipping items to product items: If selected, shipping items will be append to invoice line.
Sync timing:
· Realtime on client transaction (default): Run on same user request
· Realtime on background: Run async on background
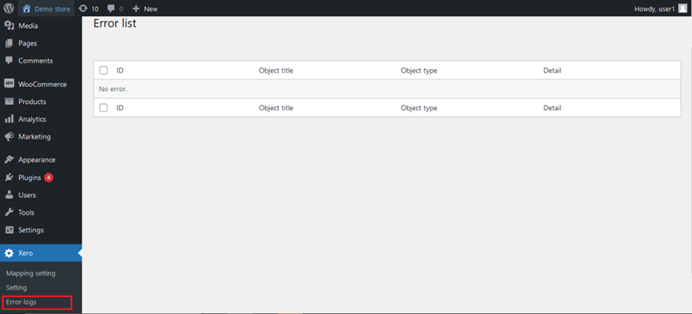
Error log
Go to Xero>Error logs, error log (if any) will be displayed here.
Support
We support customers who have valid licence through the ticket system or email.
· By ticket: https://codekiwi.net/my-account/customer-support-ticket/
· By email: contact@codekiwi.net