Plugin Installation
1. Free download the plugin .zip file at https://codekiwi.net/product/woocommerce-quickbooks-integration/
2. Go to: WordPress Admin > Plugins > Add New and Upload Plugin with the file you downloaded with Choose File.
3. Install Now and Activate the plugin.
Create connection from Woocommerce to Quickbooks
Create connection from Woocommerce to Quickbooks
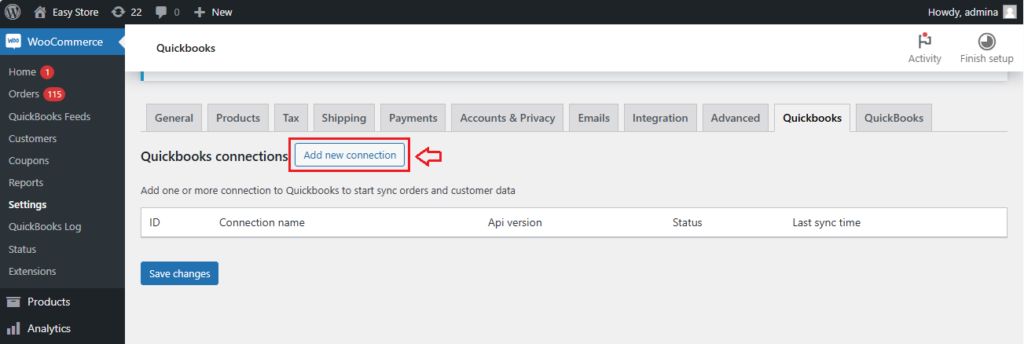
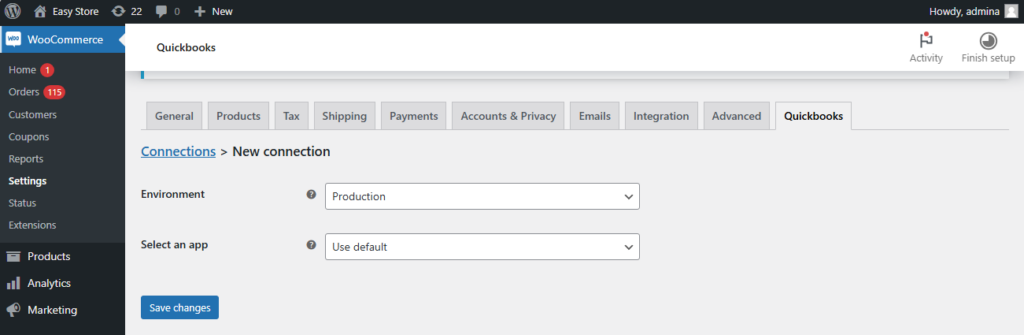
Select Production or Sandbox environment and click Save Change to redirect to Quickbooks login page.
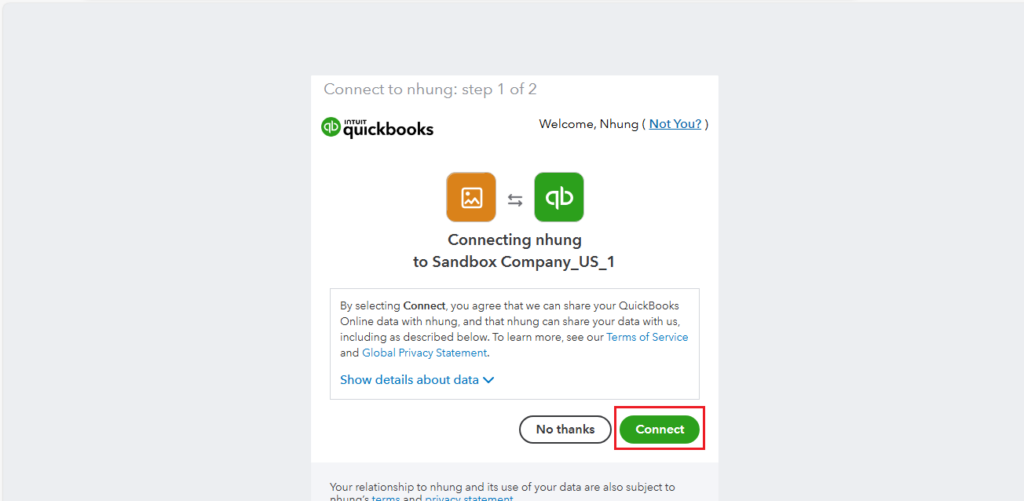
Step 5: Login with your quickbooks account
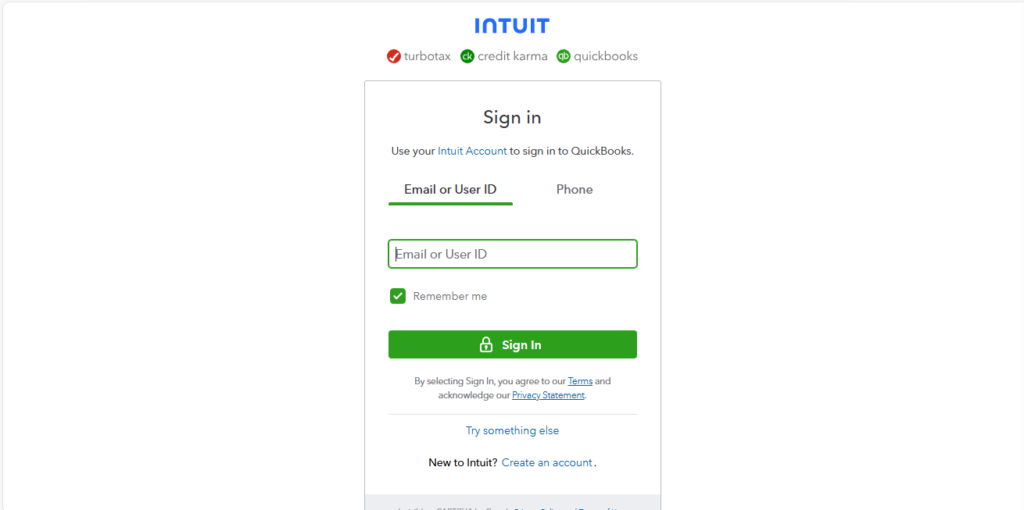
Click Connect button to grant access:
Integration configuration
Item mapping: disabled by default.
- Manual mapping product: Manual mapping one product on WooCommerce vs one item on Quickbooks.
- Auto mapping by SKU/Name: Use product SKU or product name for mapping.
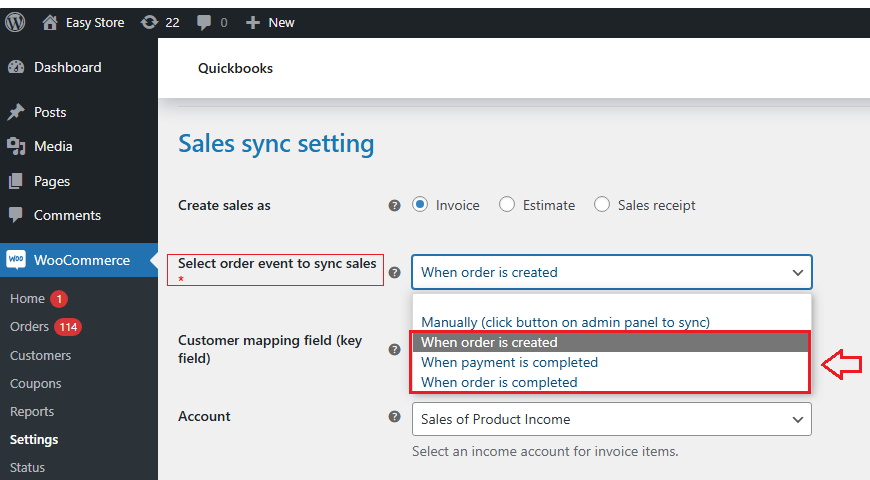
Sales sync setting:
- Create sales as: Sync WooCommerce order as Invoice/estimate or sales receipt.
- Select order event to sync sales: Select an event to trigger sync process.
- Customer mapping field: select field to find and map with existing customers (if any).
- Invoice item account: select Quickbooks account to collect sales.
- Fee item: select item to collect WooCommerce order fees.
- Document number prefix: Set prefix for invoice/ estimate or sales receipt.
Payment setting section:
- Select order event to sync payment: Select event to sync payment.
- Payment account: Select account to collect payment for your order.
Tax mapping section:
- If tax rates is not enabled on your store, please select “Don’t manage tax” option.
- If tax rates is enabled, please select “Manual mapping tax between Woo and Quickbooks” option and then map tax rates manually between two system.
Manual sync
If you select “manual” for “invoice “, order will never be sync unless you open your oder detail and click the following buttons in sequence: Sync contact > Sync Invoices > Sync payment
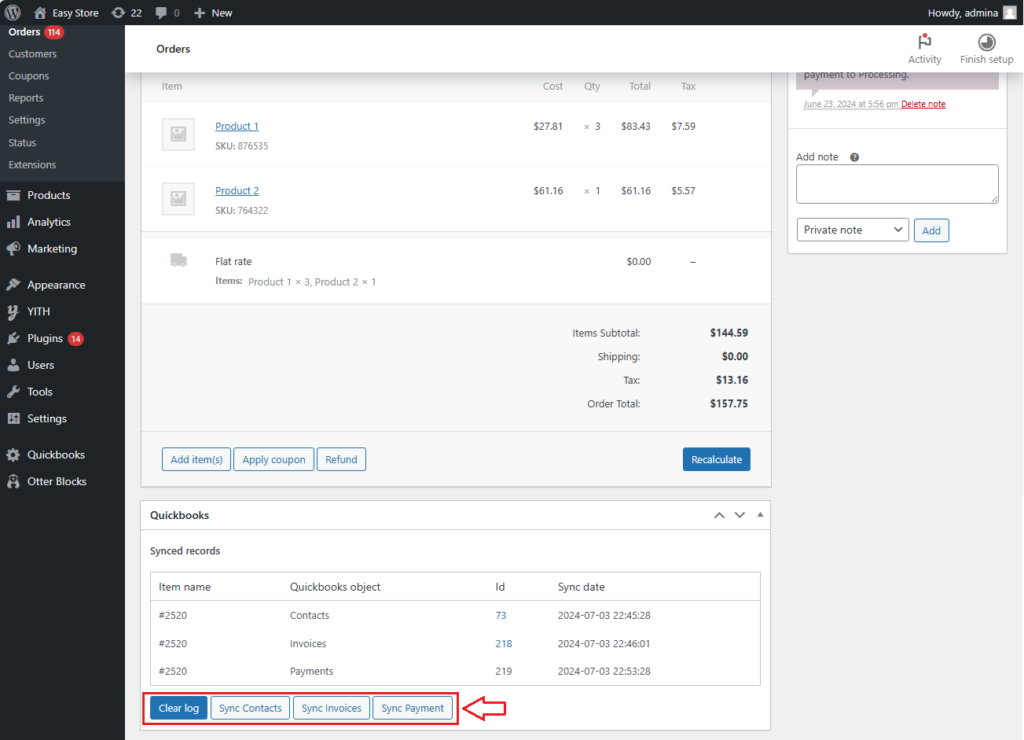
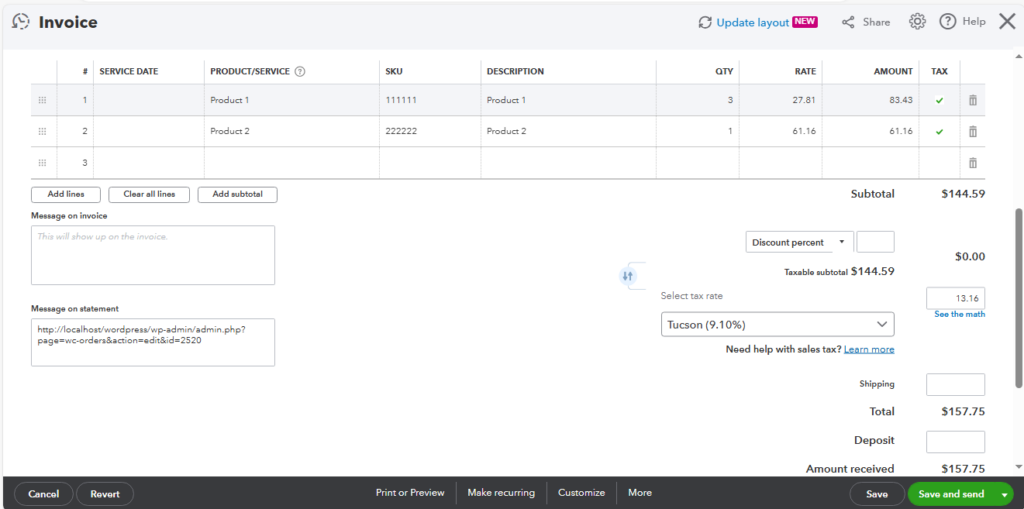
Result in Quickbooks:
Automatic sync
If you want to change from manual to automatic sync mode, go to: Quickbooks > Mapping setting, on the “Select order event to sync invoice” and select event when automatic sync will be triggered. Do the same with payment
Filter by sync status
In the WooCommerce order list screen, a “sync status” column will be added to help you easily filter the order list by sync status
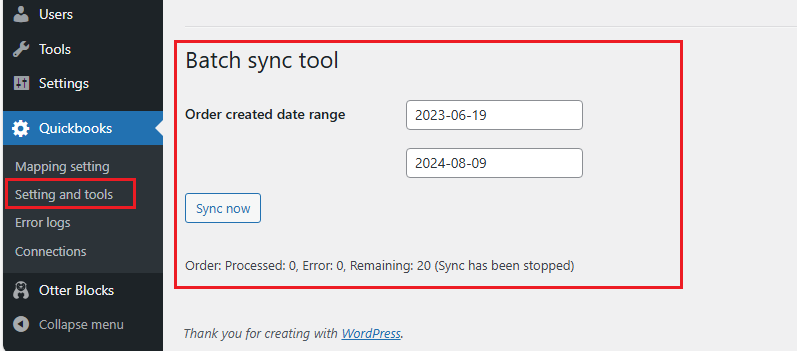
Sync history orders
We provide you batch sync tool that helps you sync orders that have been created in the past. Please select the order created date range and click the “sync now” button.
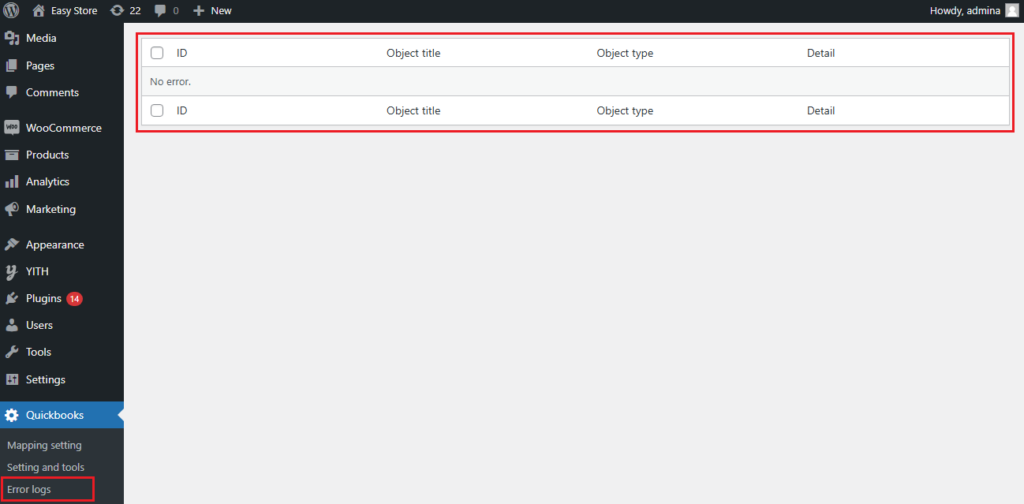
Error log
Go to Quickbooks>Error logs, error log (if any) will be displayed here.